Discover llm products found across trusted public sources.
Discover Alchemist AI - eco-friendly AI search and insights platform that tracks environmental impact while delivering intelligent answers. Join the mission to plant 1M trees!

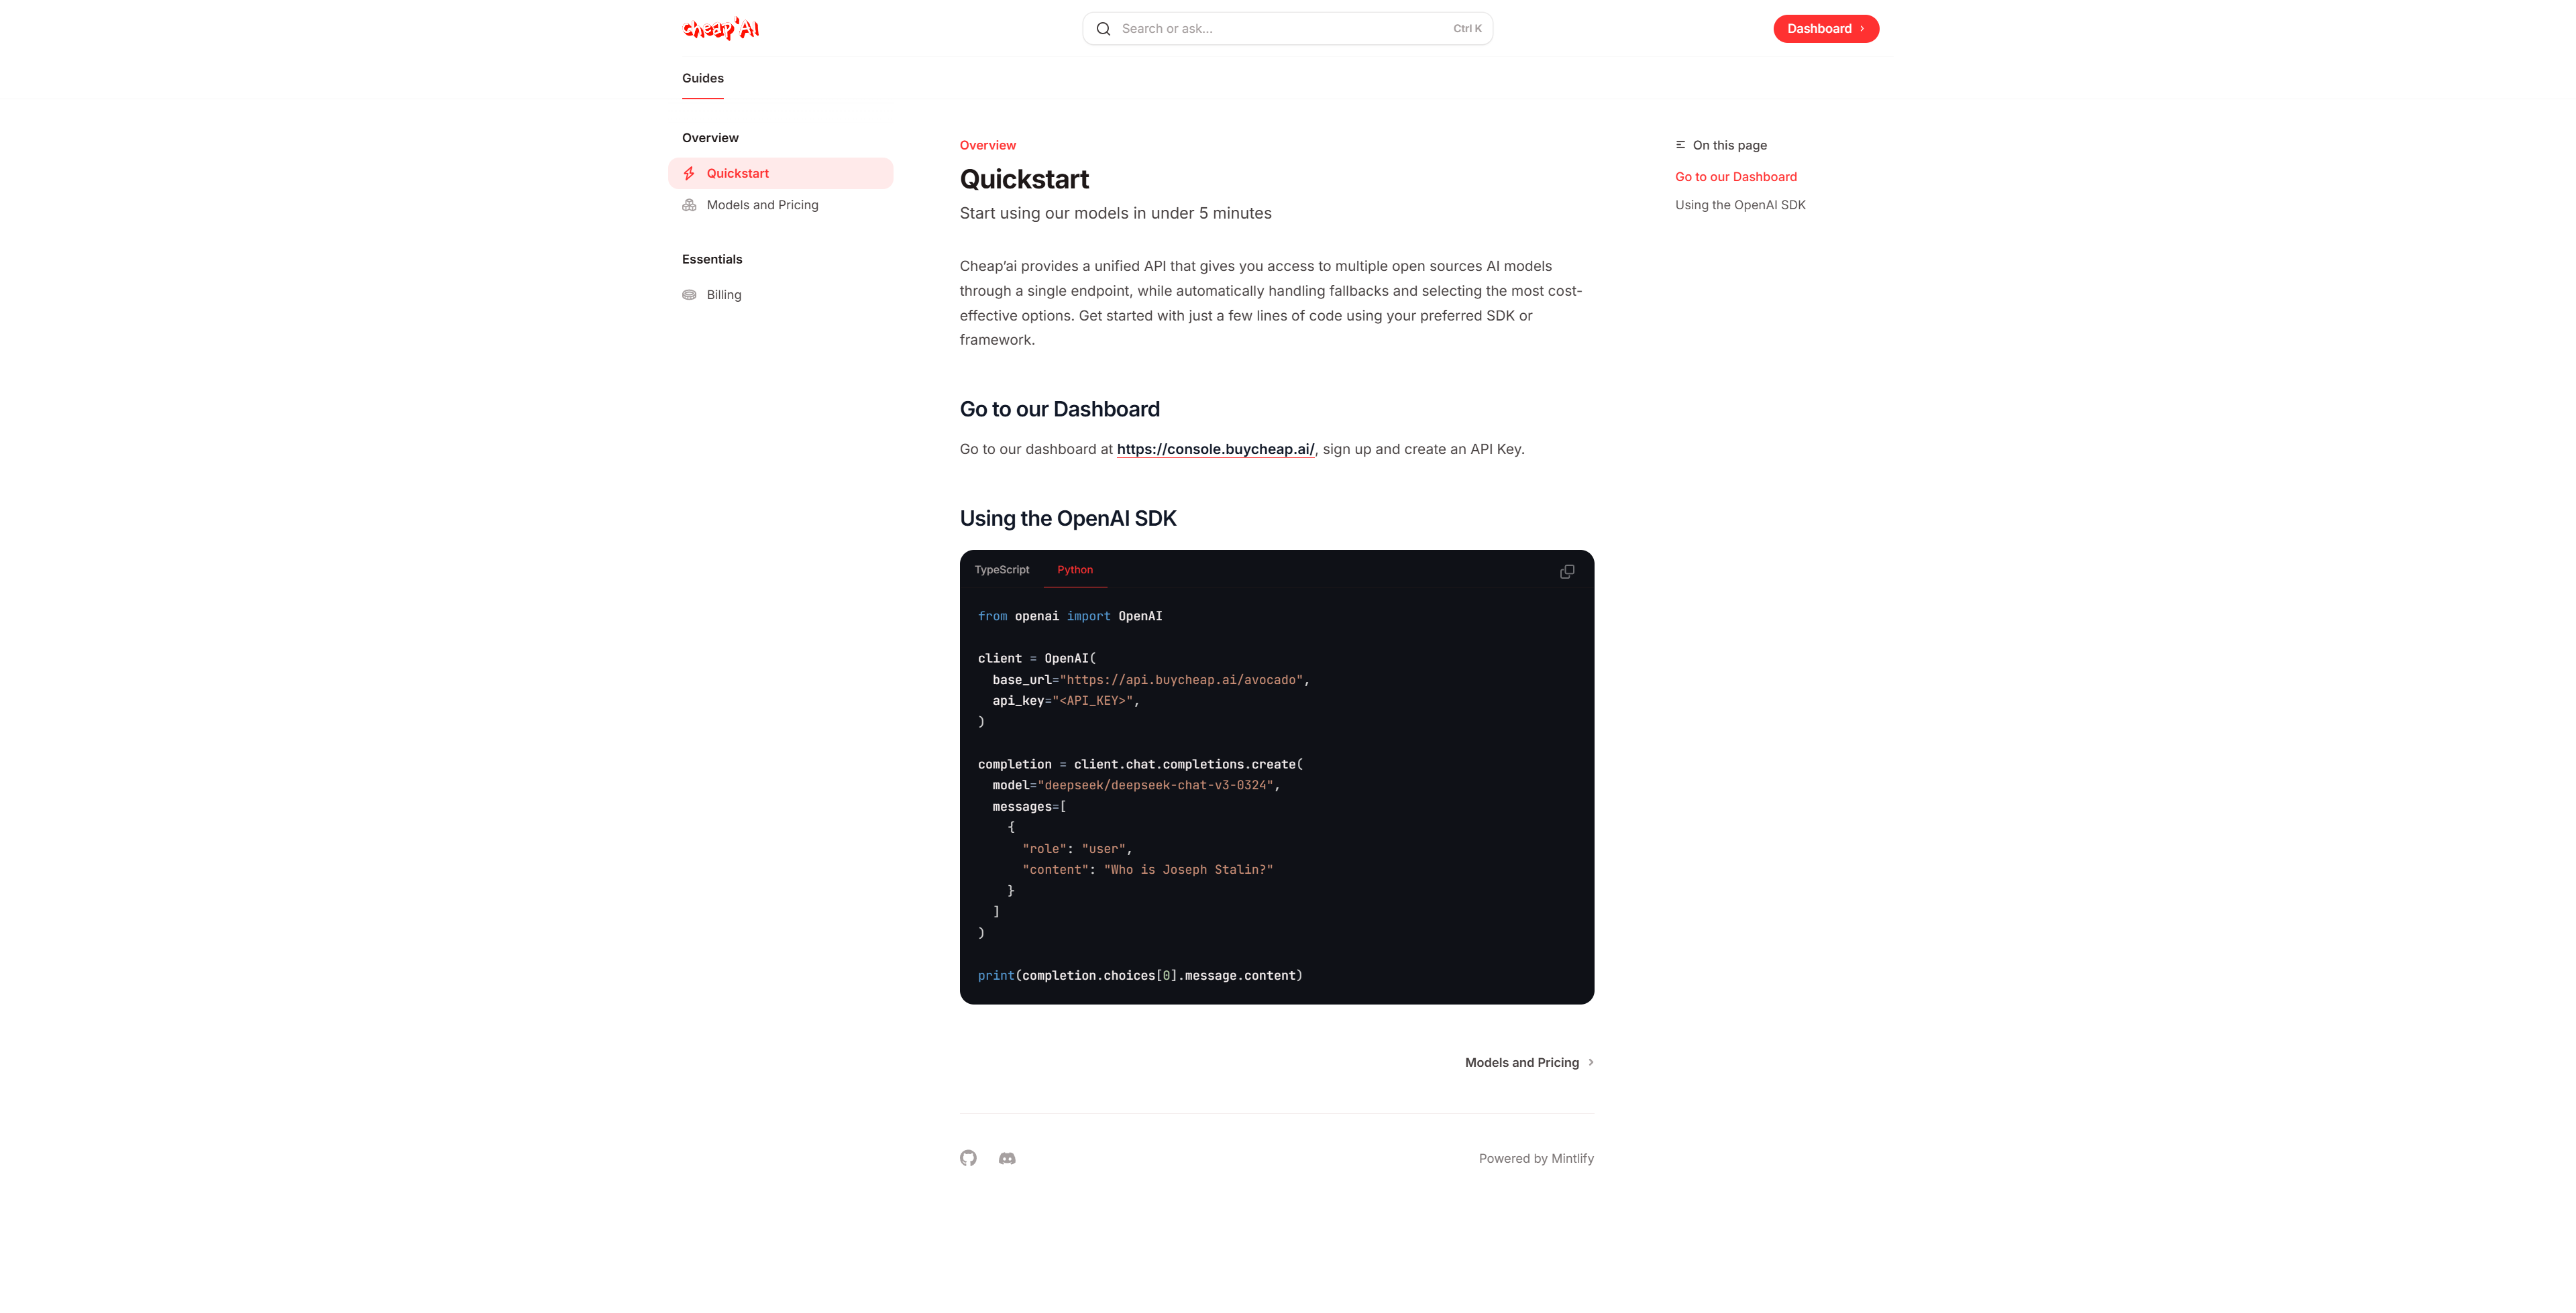
Helicone AI Gateway The fastest, lightest, and easiest-to-integrate AI Gateway on the market. Built by the team at Helicone, open-sourced for the community. 🚀 Quick Start • 📖 Docs • 💬 Discord • 🌐 Website 🚆 1 API. 100+ models. Open-source, lightweight, and built on Rust. Handle hundreds of models and millions of LLM requests with minimal latency and maximum reliability. The NGINX of LLMs. 👩🏻💻 Set up in seconds With the cloud hosted AI Gateway from openai import OpenAI client = OpenAI( api_key="YOUR_HELICONE_API_KEY", base_url="https://ai-gateway.helicone.ai/ai", ) completion = client.chat.completions.create( model="openai/gpt-4o-mini", # or 100+ models messages=[ { "role": "user", "content": "Hello, how are you?" } ] ) -- For custom config, check out our configuration guide and the providers we support. Why Helicone AI Gateway? 🌐 Unified interface Request any LLM provider using familiar OpenAI syntax. Stop rewriting integrations—use one API for OpenAI, Anthropic, Google, AWS Bedrock, and 20+ more providers. ⚡ Smart provider selection Smart Routing to always hit the fastest, cheapest, or most reliable option, and always aware of provider uptimes and your rate limits. Built-in strategies include model-based latency routing (fastest model), provider latency-based P2C + PeakEWMA (fastest provider), weighted distribution (based on model weight), and cost optimization (cheapest option). 💰 Control your spending Rate limit to prevent runaway costs and usage abuse. Set limits per user, team, or globally with support for request counts, token usage, and dollar amounts. 🚀 Improve performance Cache responses to reduce costs and latency by up to 95%. Supports Redis and S3 backends with intelligent cache invalidation. 📊 Simplified tracing Monitor performance and debug issues with built-in Helicone integration, plus OpenTelemetry support for logs, metrics, and traces. ☁️ One-click deployment Use our cloud-hosted AI Gateway or deploy it to your own infrastructure in seconds by using Docker or following any of our deployment guides here. Launch.Final.1.1.1.mp4 ⚡ Scalable for production Metric Helicone AI Gateway Typical Setup P95 Latency <5ms ~60-100ms Memory Usage ~64MB ~512MB Requests/sec ~3,000 ~500 Binary Size ~30MB ~200MB Cold Start ~100ms ~2s Note: See benchmarks/README.md for detailed benchmarking methodology and results. 🎥 Demo AI.Gateway.Demo.mp4 🏗️ How it works ┌─────────────────┐ ┌─────────────────┐ ┌─────────────────┐ │ Your App │───▶│ Helicone AI │───▶│ LLM Providers │ │ │ │ Gateway │ │ │ │ OpenAI SDK │ │ │ │ • OpenAI │ │ (any language) │ │ • Load Balance │ │ • Anthropic │ │ │ │ • Rate Limit │ │ • AWS Bedrock │ │ │ │ • Cache │ │ • Google Vertex │ │ │ │ • Trace │ │ • 20+ more │ │ │ │ • Fallbacks │ │ │ └─────────────────┘ └─────────────────┘ └─────────────────┘ │ ▼ ┌─────────────────┐ │ Helicone │ │ Observability │ │ │ │ • Dashboard │ │ • Observability │ │ • Monitoring │ │ • Debugging │ └─────────────────┘ ⚙️ Custom configuration Cloud hosted router configuration For the cloud hosted router, we provide a configuration wizard in the UI to help you setup your router without the need for any YAML engineering. For complete reference of our configuration options, check out our configuration reference and the providers we support. 📚 Migration guide From OpenAI (Python) from openai import OpenAI client = OpenAI( - api_key=os.getenv("OPENAI_API_KEY") + api_key="placeholder-api-key" # Gateway handles API keys + base_url="http://localhost:8080/router/your-router-name" ) response = client.chat.completions.create( - model="gpt-4o-mini", + model="openai/gpt-4o-mini", # or 100+ models messages=[{"role": "user", "content": "Hello!"}] ) From OpenAI (TypeScript) import { OpenAI } from "openai"; const client = new OpenAI({ - apiKey: os.getenv("OPENAI_API_KEY") + apiKey: "placeholder-api-key", // Gateway handles API keys + baseURL: "http://localhost:8080/router/your-router-name", }); const response = await client.chat.completions.create({ - model: "gpt-4o", + model: "openai/gpt-4o", messages: [{ role: "user", content: "Hello from Helicone AI Gateway!" }], }); Self-host the AI Gateway The option might be best for you if you are extremely latency sensitive, or want to avoid a cloud offering and would prefer to self host the gateway. Run the AI Gateway locally Set up your .env file with your PROVIDER_API_KEYs OPENAI_API_KEY=your_openai_key ANTHROPIC_API_KEY=your_anthropic_key Run locally in your terminal npx @helicone/ai-gateway@latest Make your requests using any OpenAI SDK: from openai import OpenAI client = OpenAI( base_url="http://localhost:8080/ai", # Gateway handles API keys, so this only needs to be # set to a valid Helicone API key if authentication is enabled. api_key="placeholder-api-key" ) # Route to any LLM provider through the same interface, we handle the rest. response = client.chat.completions.create( model="anthropic/claude-3-5-sonnet", # Or other 100+ models.. messages=[{"role": "user", "content": "Hello from Helicone AI Gateway!"}] ) That's it. No new SDKs to learn, no integrations to maintain. Fully-featured and open-sourced. -- For custom config, check out our configuration guide and the providers we support. Self hosted configuration customization If you are self hosting the gateway and would like to configure different routing strategies, you may follow the below steps: 1. Set up your environment variables Include your PROVIDER_API_KEYs in your .env file. If you would like to enable authentication, set the HELICONE_CONTROL_PLANE_API_KEY variable as well. OPENAI_API_KEY=sk-... ANTHROPIC_API_KEY=sk-ant-... HELICONE_CONTROL_PLANE_API_KEY=sk-... 2. Customize your config file Note: This is a sample config.yaml file. Please refer to our configuration guide for the full list of options, examples, and defaults. See our full provider list here. helicone: # Include your HELICONE_API_KEY in your .env file features: all cache-store: type: in-memory global: # Global settings for all routers cache: directive: "max-age=3600, max-stale=1800" routers: your-router-name: # Single router configuration load-balance: chat: strategy: model-latency models: - openai/gpt-4o-mini - anthropic/claude-3-7-sonnet rate-limit: per-api-key: capacity: 1000 refill-frequency: 1m # 1000 requests per minute 3. Run with your custom configuration npx @helicone/ai-gateway@latest --config config.yaml 4. Make your requests from openai import OpenAI import os helicone_api_key = os.getenv("HELICONE_API_KEY") client = OpenAI( base_url="http://localhost:8080/router/your-router-name", api_key=helicone_api_key ) # Route to any LLM provider through the same interface, we handle the rest. response = client.chat.completions.create( model="anthropic/claude-3-5-sonnet", # Or other 100+ models.. messages=[{"role": "user", "content": "Hello from Helicone AI Gateway!"}] ) For a complete guide on self-hosting options, including Docker deployment, Kubernetes, and cloud platforms, see our deployment guides. 📚 Resources Documentation 📖 Full Documentation - Complete guides and API reference 🚀 Quickstart Guide - Get up and running in 1 minute 🔬 Advanced Configurations - Configuration reference & examples Community 💬 Discord Server - Our community of passionate AI engineers 🐙 GitHub Discussions - Q&A and feature requests 🐦 Twitter - Latest updates and announcements 📧 Newsletter - Tips and tricks to deploying AI applications Support 🎫 Report bugs: Github issues 💼 Enterprise Support: Book a discovery call with our team 📄 License The Helicone AI Gateway is licensed under the Apache License - see the file for details. Made with ❤️ by Helicone. Website • Docs • Twitter • Discord

ACI: Open-Source Infra to Power Unified MCP Servers and VibeOps NoteThis repo is for the ACI.dev platform. If you're looking for the Unified MCP server built with ACI.dev, see aci-mcp. ACI.dev is the open-source tool-calling platform that hooks up 600+ tools into any agentic IDE or custom AI agent. It gives agents intent-aware access to tools with multi-tenant auth, granular permissions, and dynamic tool discovery—exposed as either direct function calls or through a Unified Model-Context-Protocol (MCP) server. Examples: Instead of writing separate OAuth flows and API clients for Google Calendar, Slack, and more, use ACI.dev to manage authentication and provide AI agents with unified, secure function calls. Access these capabilities through our Unified MCP server or via our lightweight Python SDK, compatible with any LLM framework. Supercharge vibe coding and automate devOps by adding a single unified MCP server to your favourite agentic IDE. Configure the MCP with Vercel, Supabase, Cloudflare, and other platforms. Let AI handle provisioning, deployment, database configs, and debugging to turn a vibe coded prototype into a live product. Join us on Discord to help shape the future of Open Source AI Infrastructure and VibeOps. 🌟 Star ACI.dev to stay updated on new releases! 📺 Demo Video ACI.dev Unified MCP Server Demo ACI.dev VibeOps Demo ✨ Key Features 600+ Pre-built Integrations: Connect to popular services and apps in minutes. Flexible Access Methods: Use our unified MCP server or our lightweight SDK for direct function calling. Multi-tenant Authentication: Built-in OAuth flows and secrets management for both developers and end-users. Enhanced Agent Reliability: Natural language permission boundaries and dynamic tool discovery. Framework & Model Agnostic: Works with any LLM framework and agent architecture. 100% Open Source: Everything released under Apache 2.0 (backend, dev portal, integrations). 💡 Why Use ACI.dev? ACI.dev improves tool-calling reliability and accountability: Authentication at Scale: Connect multiple users to multiple services securely. Discovery Without Overload: Find and use the right tools without overwhelming LLM context windows. Natural Language Permissions: Control agent capabilities with human-readable boundaries. Tool-use Logging: See how your agent called tools and the issues it ran into. Build Once, Run Anywhere: No vendor lock-in with our open source, framework-agnostic approach. 🧰 Common Use Cases VibeOps: Automate devOps by letting your agentic IDE access Vercel, Supabase, Cloudflare, Sentry and more to ship live products. Personal Assistant Chatbots: Build chatbots that can search the web, manage calendars, send emails, interact with SaaS tools, etc. Research Agent: Conducts research on specific topics and syncs results to other apps (e.g., Notion, Google Sheets). Outbound Sales Agent: Automates lead generation, email outreach, and CRM updates. Customer Support Agent: Provides answers, manages tickets, and performs actions based on customer queries. 🔗 Quick Links Managed Service: aci.dev Documentation: aci.dev/docs Available Tools List: aci.dev/tools Python SDK: github.com/aipotheosis-labs/aci-python-sdk Typescript SDK: github.com/aipotheosis-labs/aci-typescript-sdk Unified MCP Server: github.com/aipotheosis-labs/aci-mcp Agent Examples Built with ACI.dev: github.com/aipotheosis-labs/aci-agents Blog: aci.dev/blog Community: Discord | Twitter/X | LinkedIn 💻 Getting Started: Local Development To run the full ACI.dev platform (backend server and frontend portal) locally, follow the individual README files for each component: Backend: backend/README.md Frontend: frontend/README.md 👋 Contributing We welcome contributions! Please see our CONTRIBUTING.md for more information. Integration Requests Missing any integrations (apps or functions) you need? Please see our Integration Request Template and submit an integration request! Or, if you're feeling adventurous, you can submit a PR to add the integration yourself!
Bifrost AI Gateway The fastest way to build AI applications that never go down Bifrost is a high-performance AI gateway that unifies access to 23+ providers (OpenAI, Anthropic, AWS Bedrock, Google Vertex, and more) through a single OpenAI-compatible API. Deploy in seconds with zero configuration and get automatic failover, load balancing, semantic caching, and enterprise-grade features. Quick Start Go from zero to production-ready AI gateway in under a minute. Step 1: Start Bifrost Gateway # Install and run locally npx -y @maximhq/bifrost # Or use Docker docker run -p 8080:8080 maximhq/bifrost Step 2: Configure via Web UI # Open the built-in web interface open http://localhost:8080 Step 3: Make your first API call curl -X POST http://localhost:8080/v1/chat/completions \ -H "Content-Type: application/json" \ -d '{ "model": "openai/gpt-4o-mini", "messages": [{"role": "user", "content": "Hello, Bifrost!"}] }' That's it! Your AI gateway is running with a web interface for visual configuration, real-time monitoring, and analytics. Complete Setup Guides: Gateway Setup - HTTP API deployment Go SDK Setup - Direct integration Enterprise Deployments Bifrost supports enterprise-grade, private deployments for teams running production AI systems at scale. In addition to private networking, custom security controls, and governance, enterprise deployments unlock advanced capabilities including adaptive load balancing, clustering, guardrails, MCP gateway and and other features designed for enterprise-grade scale and reliability. Explore enterprise capabilities Key Features Core Infrastructure Unified Interface - Single OpenAI-compatible API for all providers Multi-Provider Support - OpenAI, Anthropic, AWS Bedrock, Google Vertex, Azure, Cerebras, Cohere, Mistral, Ollama, Groq, and more Automatic Fallbacks - Seamless failover between providers and models with zero downtime Load Balancing - Intelligent request distribution across multiple API keys and providers Advanced Features Model Context Protocol (MCP) - Enable AI models to use external tools (filesystem, web search, databases) Semantic Caching - Intelligent response caching based on semantic similarity to reduce costs and latency Multimodal Support - Support for text,images, audio, and streaming, all behind a common interface. Custom Plugins - Extensible middleware architecture for analytics, monitoring, and custom logic Governance - Usage tracking, rate limiting, and fine-grained access control Enterprise & Security Budget Management - Hierarchical cost control with virtual keys, teams, and customer budgets User Provisioning (OIDC) - OAuth 2.0 / OIDC login with background directory sync for teams, roles, and business units Observability - Native Prometheus metrics, distributed tracing, and comprehensive logging Secrets Management - Secure API key management with environment variables and deployment secrets Developer Experience Zero-Config Startup - Start immediately with dynamic provider configuration Drop-in Replacement - Replace OpenAI/Anthropic/GenAI APIs with one line of code SDK Integrations - Native support for popular AI SDKs with zero code changes Configuration Flexibility - Web UI, API-driven, or file-based configuration options Repository Structure Bifrost uses a modular architecture for maximum flexibility: bifrost/ ├── npx/ # NPX script for easy installation ├── core/ # Core functionality and shared components │ ├── providers/ # Provider-specific implementations (OpenAI, Anthropic, etc.) │ ├── schemas/ # Interfaces and structs used throughout Bifrost │ └── bifrost.go # Main Bifrost implementation ├── framework/ # Framework components for data persistence │ ├── configstore/ # Configuration storages │ ├── logstore/ # Request logging storages │ └── vectorstore/ # Vector storages ├── transports/ # HTTP gateway and other interface layers │ └── bifrost-http/ # HTTP transport implementation ├── ui/ # Web interface for HTTP gateway ├── plugins/ # Extensible plugin system │ ├── governance/ # Budget management and access control │ ├── jsonparser/ # JSON parsing and manipulation utilities │ ├── logging/ # Request logging and analytics │ ├── maxim/ # Maxim's observability integration │ ├── mocker/ # Mock responses for testing and development │ ├── semanticcache/ # Intelligent response caching │ └── telemetry/ # Monitoring and observability ├── docs/ # Documentation and guides └── tests/ # Comprehensive test suites Getting Started Options Choose the deployment method that fits your needs: 1. Gateway (HTTP API) Best for: Language-agnostic integration, microservices, and production deployments # NPX - Get started in 30 seconds npx -y @maximhq/bifrost # Docker - Production ready docker run -p 8080:8080 -v $(pwd)/data:/app/data maximhq/bifrost Features: Web UI, real-time monitoring, multi-provider management, zero-config startup Learn More: Gateway Setup Guide 2. Go SDK Best for: Direct Go integration with maximum performance and control go get github.com/maximhq/bifrost/core Features: Native Go APIs, embedded deployment, custom middleware integration Learn More: Go SDK Guide 3. Drop-in Replacement Best for: Migrating existing applications with zero code changes # OpenAI SDK - base_url = "https://api.openai.com" + base_url = "http://localhost:8080/openai" # Anthropic SDK - base_url = "https://api.anthropic.com" + base_url = "http://localhost:8080/anthropic" # Google GenAI SDK - api_endpoint = "https://generativelanguage.googleapis.com" + api_endpoint = "http://localhost:8080/genai" Learn More: Integration Guides Performance Bifrost adds virtually zero overhead to your AI requests. In sustained 5,000 RPS benchmarks, the gateway added only 11 µs of overhead per request. Metric t3.medium t3.xlarge Improvement Added latency (Bifrost overhead) 59 µs 11 µs -81% Success rate @ 5k RPS 100% 100% No failed requests Avg. queue wait time 47 µs 1.67 µs -96% Avg. request latency (incl. provider) 2.12 s 1.61 s -24% Key Performance Highlights: Perfect Success Rate - 100% request success rate even at 5k RPS Minimal Overhead - Less than 15 µs additional latency per request Efficient Queuing - Sub-microsecond average wait times Fast Key Selection - ~10 ns to pick weighted API keys Complete Benchmarks: Performance Analysis Documentation Complete Documentation: https://docs.getbifrost.ai Quick Start Gateway Setup - HTTP API deployment in 30 seconds Go SDK Setup - Direct Go integration Provider Configuration - Multi-provider setup Features Multi-Provider Support - Single API for all providers MCP Integration - External tool calling Semantic Caching - Intelligent response caching Fallbacks & Load Balancing - Reliability features Budget Management - Cost control and governance Integrations OpenAI SDK - Drop-in OpenAI replacement Anthropic SDK - Drop-in Anthropic replacement AWS Bedrock SDK - AWS Bedrock integration Google GenAI SDK - Drop-in GenAI replacement LiteLLM SDK - LiteLLM integration Langchain SDK - Langchain integration Enterprise Custom Plugins - Extend functionality Clustering - Multi-node deployment Secrets Management - Secure key management Production Deployment - Scaling and monitoring Need Help? Join our Discord for community support and discussions. Get help with: Quick setup assistance and troubleshooting Best practices and configuration tips Community discussions and support Real-time help with integrations Contributing We welcome contributions of all kinds! See our Contributing Guide for: Setting up the development environment Code conventions and best practices How to submit pull requests Building and testing locally For development requirements and build instructions, see our Development Setup Guide.
Token Governor Re-engineer LLM prompts to spend the fewest tokens that still answer — a governing gateway with auth, budgets, caching, and streaming that works with Anthropic, OpenAI, Gemini, and any OpenAI-compatible provider. Plus a live A/B, saved constraint presets, and a batch triage that flags prompts which never needed a model. llm · tokens · cost-optimization · ai-gateway · llmops · openai · anthropic · gemini · streaming · prompt-engineering Single mode — build a constrained request, see projected savings, and get a verdict when the wrapper costs more than it saves. Presets — save/load constraint configs; they persist in the browser. Batch mode — score a list of prompts, flag deterministic ones, export CSV/Markdown, and get a suggested script for each flagged row. Live A/B — runs your prompt twice (raw vs. governed) through a server-side proxy and reports real token counts, using whichever provider you configure. The app A fixed one-screen dashboard (no page scroll — panels scroll internally). The top bar carries the mode tabs and pricing/scale inputs; below sit three panels: Prompt & constraints — the prompt plus succinctness, output shape, temperature, and toggles. Projected savings — a gauge, a "worth it / costs more than it saves" verdict, and a before/after cost receipt. Assembled request & live A/B — the generated system prompt with copy buttons, and a raw-vs-governed A/B that reports the real token counts returned. Switch to Batch mode and this becomes a triage table that flags deterministic prompts. (The image is a layout mockup, not a screenshot — run the app for the live, interactive version.) Requirements Node.js 18+ (uses the built-in fetch) An API key for one LLM provider (only needed for the live A/B panel) Setup npm install cp .env.example .env # then edit .env (see "Providers" below) Providers The server is provider-agnostic. Set these in .env: Variable Purpose LLM_PROVIDER anthropic or openai (openai = any OpenAI-compatible API) LLM_API_KEY your key (kept server-side; never sent to the browser) LLM_MODEL model id your key can access LLM_BASE_URL optional; override to point at Gemini, Groq, OpenRouter, Ollama, etc. The frontend never changes: it POSTs a normalized request to /api/messages, and the adapter in server/providers.js translates to/from the chosen provider and returns a normalized response. To add a native provider, edit that one file. Supported providers Almost every provider now offers an OpenAI-compatible API, so it works by setting a base URL and model — no code change. Only providers you want to hit on their own native protocol need an adapter. Provider Supported? How Anthropic Yes native (LLM_PROVIDER=anthropic, or gateway /v1/messages) OpenAI Yes LLM_PROVIDER=openai Gemini Yes OpenAI-compat base URL (below) Groq, OpenRouter, Together, Mistral, Fireworks, DeepSeek, xAI/Grok Yes OpenAI-compat base URL Local — Ollama, vLLM, llama.cpp Yes OpenAI-compat base URL Azure OpenAI Mostly OpenAI-compat, but needs a different auth header + api-version Cohere / Bedrock / Vertex native protocols Not yet would need a native adapter in server/providers.js Examples All OpenAI-compatible providers use LLM_PROVIDER=openai: # OpenAI LLM_MODEL=gpt-4o-mini # Gemini (Google AI Studio) — NOTE: no trailing slash (the code appends /chat/completions) LLM_BASE_URL=https://generativelanguage.googleapis.com/v1beta/openai LLM_MODEL=gemini-2.5-flash # use a model your key can access # Groq LLM_BASE_URL=https://api.groq.com/openai/v1 # OpenRouter LLM_BASE_URL=https://openrouter.ai/api/v1 # Local Ollama LLM_BASE_URL=http://localhost:11434/v1 LLM_API_KEY=ollama Notes: Gemini trailing slash. Google's own docs use .../v1beta/openai/ because the OpenAI SDK appends chat/completions. This server appends /chat/completions, so drop the trailing slash or you'll get a double-slash 404. Some newer OpenAI models expect max_completion_tokens — set OPENAI_MAX_TOKENS_PARAM=max_completion_tokens if you hit that error. Model availability changes and varies by key; if a model 404s, pick one from your provider's current list. npm run check:live confirms the wiring end to end. Native Gemini SDK (generateContent) is not supported. If your app uses the Google GenAI SDK's native API rather than its OpenAI-compat mode, either switch that client to OpenAI-compat mode or add a native Gemini adapter (a body-mapper plus a :streamGenerateContent passthrough, parallel to the Anthropic adapter). Develop npm run dev Vite frontend on http://localhost:5173 Express API on http://localhost:8787 (Vite proxies /api to it) Build and run in production npm run build # outputs dist/ npm start # Express serves dist/ AND /api on PORT (default 8787) Pre-deploy check Confirm the key and model are wired before you ship: npm run check # hits a running server's /api/health npm run check:start # boots the server itself, checks, stops npm run check:live # also sends a tiny real prompt (costs a few tokens) Check a deployed instance instead of localhost: HEALTH_URL=https://your-app.example.com/api/health npm run check It verifies the health endpoint responds, the key is present, and a model and base URL are configured; --live additionally confirms a real round-trip. Exit code is 0 on success, 1 on any failure — so it drops straight into CI. Runtime gateway (integrate with a live app) Beyond the analysis UI, the server is also a governing gateway. Point your existing SDK's base_url at it and every call is governed automatically — constraints injected, max_tokens capped, deterministic prompts optionally blocked — then streamed straight back. Your app code barely changes. Native endpoints: Endpoint Protocol Upstream POST /v1/messages Anthropic Anthropic (or ANTHROPIC_BASE_URL) POST /v1/chat/completions OpenAI-compatible OpenAI / OPENAI_BASE_URL GET /v1/governor/info — lists policies + wiring (no secrets) Per-request control via headers: Header Effect x-governor-policy: terse pick a named policy (default, terse, strict, passthrough) x-governor-detect: block override detect mode (off / warn / block) x-governor: off bypass governance for this call Policies live in server/policies.js (instructions, maxTokensCap, forceTemperature, detect). Edit or add your own. Point your SDK at it # OpenAI SDK from openai import OpenAI client = OpenAI(base_url="http://localhost:8787/v1", api_key="unused") client.chat.completions.create( model="gpt-4o-mini", stream=True, messages=[{"role": "user", "content": "..."}], extra_headers={"x-governor-policy": "terse"}, ) # Anthropic SDK from anthropic import Anthropic client = Anthropic(base_url="http://localhost:8787", api_key="unused") with client.messages.stream(model="claude-sonnet-5", max_tokens=1024, messages=[{"role": "user", "content": "..."}]) as s: for text in s.text_stream: print(text, end="") (The gateway supplies the real key from its env; the SDK's api_key is ignored.) Streaming stream: true is passed through as Server-Sent Events, unmodified, with backpressure preserved. The gateway sniffs a copy only to log token usage — it never alters the bytes your client receives. Try it: node examples/stream.mjs # OpenAI-protocol streaming demo curl -N http://localhost:8787/v1/chat/completions \ -H 'content-type: application/json' -H 'x-governor-policy: terse' \ -d '{"model":"gpt-4o-mini","stream":true,"messages":[{"role":"user","content":"hi"}]}' Notes Blocking is opt-in. Only the strict policy (or x-governor-detect: block) blocks deterministic prompts; it returns a provider-shaped 400 with a suggested script. The detector is a heuristic — run it in warn first. max_tokens is the only hard lever — instructions are advisory, the cap is enforced. Usage logging prints a [usage] … line per call. For OpenAI streaming, set stream_options.include_usage=true (the demo does) or usage will read as zero on streams. Same-protocol upstreams. Use the endpoint that matches your upstream; the gateway forwards natively rather than translating between protocols (that's what /api/messages is for). Resilience. Upstream calls have a connect timeout and retry with backoff on 429/5xx (GATEWAY_TIMEOUT_MS, GATEWAY_RETRIES). The timeout covers connect/headers, not the stream body, so long streams aren't cut off. Multi-instance. Set REDIS_URL (and npm i redis) to share budgets and cache across replicas; otherwise state is per-process. Gemini through the gateway. Point the OpenAI upstream at Gemini's OpenAI-compat base and call /v1/chat/completions: set OPENAI_BASE_URL=https://generativelanguage.googleapis.com/v1beta/openai (no trailing slash) and OPENAI_API_KEY=<gemini key>, then use a gemini-* model. See the Providers table for the full compatibility list. Control plane: auth, budgets, cache The gateway is also a cost-control plane. All three are optional and layer onto the same /v1/* endpoints (the app's own /api/messages is unaffected). Auth. Define callers, each with a bearer key and optional pinned policy and budget, in gateway.callers.json (see gateway.callers.example.json): { "callers": [ { "id": "web-app", "key": "gw_live_...", "policy": "terse", "budget": { "tokens": 2000000, "usd": 20 } }, { "id": "worker", "key": "env:WORKER_KEY", "budget": { "tokens": 500000 } } ] } Callers send Authorization: Bearer <key>. A key value of env:VAR is pulled from the environment (so it can come from an injected secret). With no callers configured the gateway runs open (anonymous) — fine for local, not for production. A caller's pinned policy is authoritative: clients can't loosen it with x-governor-* headers. Budgets. Per-caller daily token and/or USD caps (UTC reset). When a caller is over, the next call gets 429 with Retry-After. Cache hits and the current count are free. USD caps need a pricing file (gateway.pricing.example.json → GATEWAY_PRICING_FILE); token caps need nothing. Check usage: curl -H 'Authorization: Bearer gw_live_...' http://localhost:8787/v1/governor/usage Enforcement is soft (checked before each call, recorded after), and the ledger is in-memory — single-instance. For multiple replicas, back server/budget.js with a shared store (e.g. Redis). Cache. Exact-match cache for non-streaming, deterministic calls (temperature <= GATEWAY_CACHE_MAX_TEMP, default 0). A hit returns the stored response with x-governor-cache: hit, skips the provider, and doesn't charge budget. Sampled (higher-temperature) and streaming calls are never cached, so you never get a stale non-deterministic answer. Bypass per request with x-governor-cache: off. Introspect the whole plane at GET /v1/governor/info. Tests npm test Dependency-free (node --test) coverage of the control plane — auth token checks, budget enforcement, and cache determinism/keying — runnable without a provider key. npm run check / check:live validate a running server's wiring. docker build -t token-governor . docker run -p 8787:8787 \ -e LLM_PROVIDER=anthropic -e LLM_API_KEY=sk-... -e LLM_MODEL=claude-sonnet-5 \ token-governor Secret externalization The API key is never hardcoded — it comes from the environment. There are two ways to source it from a managed secret store: 1. Platform injection (recommended, no code). Let your platform fetch the secret and inject it as an env var at deploy time. Nothing in the app changes: Cloud Run: --set-secrets=LLM_API_KEY=anthropic-key:latest ECS/Fargate: task-definition secrets from AWS Secrets Manager or SSM Kubernetes: External Secrets Operator / CSI driver → env var Azure App Service / Container Apps: Key Vault references → app setting 2. In-app fetch (built in). Point any *_API_KEY at a managed secret using a scheme, and the server resolves it at startup (see server/secrets.js):
Subtext A real-time instrument for observing the verbal workspace of a language modelas it reads, reasons, and speaks. 🌐 Watch a live replay in your browser · ▶ Demo video · 📄 The paper · 🔬 Reference implementation Getting started & staying tuned with us. Star us, and you will receive all release notifications from GitHub without any delay! Overview Recent work from Anthropic identified a small set of internal representations in language models — the J-space — that behaves like a global workspace: its contents can be verbally reported by the model, deliberately modulated, and are causally used for multi-step reasoning, while the surrounding majority of neural activity remains inaccessible to report. The identification tool is the Jacobian lens, which transports a residual-stream activation at any layer into the final-layer basis and decodes it through the model's own unembedding, answering: which vocabulary words is this internal state disposed to produce, now or later? Subtext applies that method continuously during live conversation with a local model. On every token — both while the model ingests the user's message and while it generates its reply — the lens is read at nine depths and the result is rendered as it happens. The intermediate steps of the model's computation become directly watchable: verdicts form during reading, several tokens before any output; planned words hold at high strength while unrelated tokens are being emitted; two-hop questions surface their unspoken middle term. Subtext differs from the interactive readouts already available (e.g. the Neuronpedia demo) in that it is conversational and continuous: it renders the lens during a live chat, includes the reading phase over the user's message, streams at generation speed via a KV cache, and pairs the canvas with a per-token ledger and per-word inspector. Sessions can be exported and replayed in any browser without a GPU. What the lens shows that the output does not The value of the instrument is the gap between the model's internal state and its visible text. Three moments from the demo session: 1. The verdict precedes the reply. Zero tokens of output exist; the model is still reading Is this correct? 12 + 5 = 1. The workspace already holds math, addition, arithmetic, modulo — the phase indicator is amber (reading). 2. The judgment is formed, then verbalized. As the reply begins ("No, that is **not…"), incorrect dominates the workspace at high strength, with equation, calculation, statement co-active — the conclusion is internally settled several tokens before the words "not correct" appear. 3. Plans are held while other words are being said. Mid-explanation, the workspace holds modulo, bitwise, system, numbers — the technical caveat the model is about to raise — while the current output token is unrelated. These reproduce, on an open 4B model on consumer hardware, the reporting and planning phenomena described in the paper (which used Claude-scale models), including the two-hop signature: Italy at layer 20 and euros at layer 26 on the country-shaped-like-a-boot question, before generation begins. Reading the display Each rendered word is a lens readout, not model output. It indicates an internal activation disposing the model toward that word. Vertical position corresponds to layer. Early layers (perception) are at the top; readouts approach the bottom rail as they approach emission. Size and opacity encode absolute readout strength. The display applies a fixed monotone mapping from lens probability; weak readouts are rendered weak. Amber marks readouts taken while reading the user; blue while generating. Hover shows a word's per-layer activation profile; click opens an inspector with peak strength, mean depth, and strength history. The right panel records everything the canvas curates: the conversation, a live ranking of currently-active readouts, and a per-token ledger. Timeline, words, and trace Live playback is fast; nothing is lost. Every frame of the current response is kept, so the whole display can be paused and re-inspected. Scrub the response. A transport bar under the canvas (step / play / scrubber / speed) seeks to any token; the canvas, top-of-mind ranking, partial reply, and stats reconstruct to that exact moment. Click any ledger row to jump to it. During generation the view rides the live edge — scrub back freely, then hit live to catch up. Replays are scrubbable the same way. The words tab (beside the ledger) aggregates every word the lens read out during the response — how many tokens it was active, its peak layer and strength — ranked by presence. Click a word to jump to its peak moment and load it in the trace view. The trace view (cloud / trace, top left) plots one word's readout strength across layers × tokens: the x-axis is shared with the scrubber, amber while reading, blue while generating. It shows a concept climbing the stack — and igniting across it just before being spoken — structure the instantaneous cloud cannot show. Click anywhere on it to seek. Method browser (single HTML file) ⇐ websocket ⇐ server.py Qwen3.5-4B (bf16, HF transformers, KV cache) pre-fitted Jacobian lens: neuronpedia/jacobian-lens, revision qwen-n1000 per token: residual hooks at 9 layers → J_l transport → unembed → full-vocabulary softmax → word-start top-k → frame Each exchange has two phases. A single prefill pass covers the user's message, with lens readouts taken at every position (the reading phase); generation then proceeds token-by-token with a KV cache, reading the lens at the newest position each step (the thinking phase). The lens adds a per-layer matrix-vector product and an unembedding per token, so streaming runs at the model's native generation speed. Display filtering. Raw lens top-k contains punctuation and BPE continuation fragments (e.g. itude, from cert‑itude), which are not meaningful as readouts. Display is restricted to word-initial vocabulary tokens, following the reference implementation's mask_display with a stricter word-start criterion. Probabilities are computed over the full vocabulary before any filtering, so filtering affects legibility only, never the readout itself. Validation verify_accuracy.py compares this implementation's live path (forward hooks, KV cache enabled) against the reference JacobianLens.apply() on identical inputs. Across 4 layers × 3 positions on the walkthrough prompt, top-5 readouts match exactly, with cosine similarity ≥ 0.99998 between logit vectors, and reproduce the expected two-hop intermediates. The audit can be re-run at any time with the server stopped. Setup Requirements: an NVIDIA GPU with ~10 GB of VRAM (and a CUDA build of PyTorch), or an Apple Silicon Mac with 16 GB+ unified memory (PyTorch ≥ 2.3, macOS 14+; runs on the mps device), plus Python 3.11+. Without either, the server falls back to CPU (slow, but usable for smoke tests). The device is picked automatically at startup. First launch downloads the model and lens (~9 GB total) and builds a display-token mask (~1 minute, cached). git clone https://github.com/ninjahawk/Subtext cd Subtext pip install -r requirements.txt python server.py # → http://localhost:8765 On Windows, run python -u -X utf8 server.py, or use start.bat. Other models. The server is configured for Qwen3.5-4B because Neuronpedia publishes a pre-fitted lens for it (a 27B lens is also published, for larger GPUs — edit MODEL_NAME/LENS_FILE in server.py). Any HuggingFace decoder can be used by fitting your own lens with jlens.fit(); ~100 prompts produces a usable lens, and fitting a 4B-scale model takes on the order of an hour on a single consumer GPU. See the reference repo for details. Replays. The ⤓ session button exports the current conversation — every lens frame included — as a JSON file. Open the app with ?replay=<file-url> to play one back with live pacing, no GPU required; that is exactly what the hosted demo is. Limitations The instrument inherits the method's limitations. The lens reads only concepts that correspond to single vocabulary tokens; multi-token concepts are invisible or fragmentary. It approximately captures the workspace identified in the paper, not the entirety of the model's internal state, and layers below the fitted range are not observed. Interpretation should also respect the paper's own framing: workspace readouts demonstrate functional availability of information for report and reasoning; they do not demonstrate subjective experience.

▶ Try the live demo — a real Reame instance serving an LLM from a free Oracle ARM box, in your browser. A lean, fully-tested LLM inference server built on llama.cpp — designed for the hardware you already have: shared vCPUs, free tiers, 2-core ARM boxes. Reame is an inference server built for cheap CPU hardware first — not as a fallback for missing GPUs. Its thesis is simple: On a CPU, never compute the same thing twice. What Reame is for Reame is built for narrow, repetitive AI workloads over your own data, on hardware you already pay for — the case where the answer lives in the context you provide, not in the model's general knowledge. That is exactly where a small model matches a frontier one (we measured 100% accuracy on long-context extraction with a 7B on a free 2-core ARM box) and where Reame's memory makes request #100 cost a fraction of request #1. Use case Why it fits Suggested model Document extraction & classification (RAG, invoices, tickets, scraping) answers live in the context; prompts share prefixes → the disk cache pays OLMoE 7B-A1B Batch pipelines (tag 10k products overnight, meta descriptions, email triage) repetitive by nature → Palimpsest drafts them; €0 per token, no rate limits Qwen2.5 1.5B–3B AI features inside a thin-margin SaaS a €5 VPS instead of a metered API keeps unit economics alive Qwen2.5 1.5B–7B Privacy-bound work (legal, medical, public sector) data never leaves your server — full sovereignty OLMoE 7B-A1B Private code autocomplete (Continue.dev + OpenAI-compatible API) line-level completion is a narrow task; code never leaves the laptop Qwen2.5-Coder 1.5B Judgment on your data (SEO/content audits, review triage) — in batches needs real reasoning: we measured smaller models inventing findings; the 9B audited a live page correctly in 73s on a laptop Qwen3.5-9B What Reame is NOT for: a general-purpose ChatGPT replacement (frontier reasoning and broad knowledge need frontier parameter counts), agentic coding assistants, or creative long-form writing at scale. 🗂️ Persistent shared-prefix KV cache — prompt prefixes are snapshotted to disk (zstd, checksummed, LRU-budgeted) and reused across different prompts, restarts and processes. A system prompt is paid for once, by the first user. 📜 Palimpsest: the server remembers what it generated — every completed generation feeds an on-disk n-gram archive; future requests draft from it at zero cost. Domain workloads repeat themselves — let them pay off. 🎭 Il Suggeritore: grammar as a draft source — constrained decoding uses structure to forbid tokens; Reame inverts it and uses structure to propose them. List numbering, bullets and format tokens are speculated for free on content nobody has ever generated before. 🔮 Self-regulating speculative decoding — a small draft model or zero-cost n-gram lookup proposes tokens; the target verifies them in one batched pass. Reame measures whether speculation pays on your hardware and switches it off by itself when it doesn't. 🏛️ The Conclave: consensus as a quality knob — --best-of N generates N candidate answers to the same prompt in one interleaved batch (one prefill, cloned into the others via KV copy; every weight read shared) and elects the winner by majority on the final result. The moment an absolute majority agrees, the stragglers are stopped. Measured: it squeezes roughly one extra correct answer per quiz out of the model you already run — it does not make a 1.5B out-reason a 3B (consensus fixes variance, not bias). 👥 Interleaved multi-user serving — N concurrent generations advance together inside single multi-sequence batches, sharing every read of the model weights (the cost that dominates memory-bound CPU decoding). 🏰 ARCA: the shared memory daemon — reame arca starts a Redis-compatible service any language's Redis client reaches with zero SDK: an exact-response cache (a computed answer served in ~0.02 s vs ~1 s of inference) and a fleet-wide generation corpus (one node's output drafts the others'). One config line — [arca] remote = host:6420 — wires a Reame node to it, and deterministic requests are cached automatically. Proven on a free ARM box with real redis-cli. See docs/ARCA.md. 🌐 OpenAI-compatible REST API — /v1/completions, /v1/chat/completions, SSE streaming, sessions, bearer auth, metrics. Point any OpenAI client at it. ⚡ Zero-config CLI — reame run qwen2.5-1.5b downloads the model once, autoconfigures threads/KV/cache for the host and drops into a chat (or --serve). No config file until you want one. 🧪 220+ isolated test cases — every layer is mockable and tested without a model; correctness of the multi-sequence, speculative and KV-clone paths is pinned against real models in integration tests. Measured, not promised Every number below was produced by the shipped binary on the hardware named — including the negative results that shaped the design. Highlight Measured Machine MoE beats dense on CPU OLMoE 7B-A1B 26.7 tok/s vs dense 7B 3.3 tok/s, same 8/8 accuracy Oracle free (€0) Active params, not total size Marco-Nano 8B-A0.6B 46.2 tok/s — 3.2× a 3B dense (14.3 tok/s) while bigger on disk Oracle free (€0) Warm cache vs cold 4.8× end-to-end Contabo VPS Generation archive (Palimpsest) 2.3× (22→51 tok/s) M3 Pro Judgment without hallucinating Qwen3.5-9B: zero invented findings, full SEO audit in 73s M3 Pro Architecture > size dense 27B ~0.1 tok/s — 250× slower than a 7B MoE, same box Oracle free Full benchmarks, methodology and negative results → docs/BENCHMARKS.md Three negative results that matter. A 30B-class MoE on the maxed free tier answered the same extraction questions perfectly — and ten times slower than a 7B-A1B that also scored 100%: when the answer lives in the context, extra parameters buy nothing (MoE prefill touches nearly every expert, so the 3B-active discount vanishes on document reading). Use 30B-class models for hard reasoning in background batches, not for serving. On heavily oversubscribed shared vCPUs a draft model runs as slowly as its target, so speculation is counter-productive there — Reame detects this and disables it at runtime. And the Conclave does not close the gap to a model twice the size on hard reasoning: majority voting corrects random slips, not systematic misunderstanding — we measured a 1.5B ×5 land between the 1.5B and a 3B, never above the 3B. Benchmarks that only show wins are advertising; these are engineering. How it works Shared-prefix disk cache. Prompts are split into fixed token blocks; a chain hash keys a KV snapshot at every block boundary. A different prompt that shares a prefix restores the longest cached boundary and decodes only its own tail. Unlike GPU-resident prefix caches, snapshots live on NVMe: they survive restarts. Self-regulating speculation. Classic Leviathan/Chen acceptance (the rejected token is resampled from the residual distribution, so the output distribution is exactly the target's), with two CPU-first twists: the draft source can be free n-gram lookup mined from the prompt itself — ideal for extraction and rewrite workloads — and a feedback controller adapts the draft length and turns speculation off when measured acceptance or draft economics go negative. The Conclave. --best-of N submits N attempts at the same prompt to the interleaved scheduler: attempt 0 is the untouched anchor (greedy stays greedy), the explorers shift seed and heat up. The scheduler notices the identical prompts and clones the prompt KV instead of prefilling N times (copy the donor's cache, decode only the last prompt token — argmax-verified equal to a full prefill). Election is an exact-majority vote on each candidate's final number, with a Jaccard text-medoid fallback for prose; the moment a majority exists the remaining candidates are stopped mid-generation, and the CLI reports CONCLAVE consensus=k/N so a caller can escalate only when the conclave split. Use it as a quality knob: more accuracy from the model your hardware can afford, paid in idle interleaved compute rather than a bigger model's RAM. Quick start reame list # model catalog + what's on disk reame run qwen2.5-1.5b # download once, auto-config, chat reame run qwen2.5-1.5b "Explain mmap" # one-shot answer reame run qwen2.5-1.5b --serve # OpenAI-compatible API on :8080 reame run qwen2.5-1.5b "12*13-50?" --best-of 5 # the Conclave run resolves a catalog name (or any local GGUF path), downloads to ~/.reame/models on first use and picks threads, KV quantization and cache directory for the host. A config file is only needed when you want control. A real judgment task — the model audits a live page from its raw HTML (the head -c only fits it into context; the audit is all the model's): reame run qwen3.5-9b "Quick SEO audit of this page's HTML — title/meta \ quality, heading issues, images missing alt text, three concrete fixes: $(curl -s https://your-site.com | head -c 16000)" Install Homebrew (macOS / Linux): brew tap swellweb/reame brew install reame Prebuilt binaries — Linux x64/arm64 and macOS arm64 on the releases page (runtime dependency: libzstd). npm (npx reame): planned — binaries are already built per platform. Build from source git clone https://github.com/swellweb/reame cd reame git submodule update --init --depth 1 third_party/llama.cpp ./build.sh # Release build + full test suite ./scripts/download_models.sh # TinyLlama (test model, ~670 MB) ./build/src/reame --config config/reame.conf --prompt "Hello" --max-tokens 32 ./build/src/reame --config config/reame.conf --serve # OpenAI-compatible API Dependencies: CMake ≥ 3.16, a C++17 compiler, and for the server Boost (headers), nlohmann-json and zstd: # Debian/Ubuntu sudo apt install build-essential cmake libboost-dev nlohmann-json3-dev libzstd-dev pkg-config # macOS brew install cmake boost nlohmann-json zstd pkg-config Configuration highlights [model] path = models/qwen2.5-7b-instruct-q4_k_m.gguf context_length = 4096 # total KV budget (shared across users when parallel > 1) threads = 4 # fewer is often faster on shared vCPUs — measure! [memory] kv_cache_type = q8_0 # f16 | q8_0 | q4_0 — halve/quarter context RAM [speculative] enabled = true mode = lookup # model (needs draft_model_path) | lookup (no 2nd model) [cache] directory = .reame-cache max_size_mb = 4096 # LRU byte budget on disk [server] port = 8080 api_key = # bearer auth when set parallel = 1 # >1 = interleaved multi-user serving API Endpoint Description POST /v1/completions text completion (SSE with "stream": true) POST /v1/chat/completions chat completion POST /v1/sessions · .../save · .../load · DELETE .../{id} KV session snapshots GET /metrics request counters + speculative/cache metrics POST /v1/warm pre-prefill a prompt into the cache (warm-ahead) GET /health liveness (auth-exempt) Status & scope Reame is young and deliberately opinionated and focused: CPU-only serving, one model per process, correctness pinned by tests at every layer. Not goals: GPU offload, training, model management UX. The llama.cpp submodule is pinned to a known-good commit and bumped deliberately. Documentation in Italian: docs/README.it.md. Why Reame and not Ollama? The laptop story is the same one command: reame run qwen2.5-1.5b downloads, autoconfigures and chats — nothing to learn. From there the two projects diverge: Ollama optimizes for running many models casually; Reame optimizes for serving one workload seriously on hardware that costs nothing. The difference is one sentence: Ollama runs models. Reame remembers having run them. General-purpose servers treat every request as brand new: compute, discard, repeat. On a GPU that's fine — compute is cheap. On a cheap CPU, compute is the most expensive thing you have. Everything in Reame attacks that: the disk prefix cache, the generation archive, the grammar prompter, self-regulating speculation, interleaved multi-user batches, the Conclave. None of it exists in Ollama. The practical consequence: a Reame server gets faster the longer it runs. The hundredth request costs a fraction of the first — the system prompt was paid once, similar answers draft themselves from the archive, structure is speculated for free. That property is the whole design. Support Reame is free, MIT-licensed and built on nights and free-tier hardware. If it saves you API bills or GPU rent, consider sponsoring the work — sponsorships fund the roadmap: warm-ahead prefill, a semantic (L2) cache layer for the ARCA daemon, and first-class MoE serving.
Getting started · Usage · Enforcement · Performance · Design · Contributing · License verbatimeter delivers deterministic verification of groundedness by measuring verbatim reuse (contiguous matching) and verbatim paraphrasing (longest common subsequence). For your RAG agents, just plug it in with a decorator as follows: @verify(source_arg="context", scope="quotes") def generate(question, context): ... ... or use it as a CLI: verbatimeter --source-file source.txt --answer-file answer.txt Here is the decorator at work, verifying a streamed answer in real time: The animation above replays a real captured run. A minimal RAG agent (examples/openai_rag_streaming_example.py) retrieved four passages from the Attention Is All You Need abstract, asked gpt-4o-mini "What architecture does the paper propose, and why is it faster to train?", and instructed it to reuse the context's exact wording. The @verify decorator checks the stream as it arrives and prints each word in its final color: green — reproduced verbatim from the retrieved context, in contiguous runs of ≥ 3 words: an 18-word lift opens the answer and a 19-word run closes it; red — the model's own wording. Note experiments: the word appears in the source, but not inside any run of three consecutive shared words, so it is not credited — matching is contiguous runs, not isolated words; the stats line prints when the stream completes: 79% of the answer's words are verbatim reuse, and 10 of its 55 tokens differ from the source. The model never sees verbatimeter — it just answers the question; every measurement is post-hoc, deterministic, and judge-free. Replay it yourself with python examples/openai_rag_streaming_example.py (needs pip install openai python-dotenv and OPENAI_API_KEY in the environment or a .env file). One word-level alignment, two readings: Verbatim reuse (default) — word-for-word copying, in contiguous runs. Verbatim paraphrasing (--subsequence) — the source's own words reused in order but not contiguously: split up, rearranged, interleaved with new words. What it's built for: Grounding verification — how much of an answer, summary, or report comes directly from its source, and how much is verbatim-paraphrased from it. Quotation verification (--quotes) — have the model support its answer with verbatim quotations and verify each one; a quotation that differs from the source is a caught fabrication. Add --fail to gate a pipeline on it. This is lexical matching, not semantic: it helps detect hallucinations — a deterministic lower bound on grounding failures — but it does not judge unquoted claims or faithful paraphrase. Multilingual — any language that separates words with spaces, with Unicode-normalized, case-folded matching. Validated on eleven languages, from English and French to Hindi, Urdu, and Arabic; quotation extraction understands "…", “…”, « … », and „…“. Unsegmented scripts (Chinese, Japanese, Thai) are not yet supported. Lightweight and offline — one runtime dependency (tiktoken), with the vocabulary bundled: no network access, ever. Scope is deliberately narrow: it verifies, highlights, and collects statistics on text you provide. Extracting text from PDFs, Word documents, HTML, and other formats is out of scope — perform the extraction with the library of your choice, then pass the resulting text in. Getting started pip install verbatimeter tiktoken is the only runtime dependency, and it is only needed for the default token counter (see Tokenizer). No files, no quotation marks — paste this from any directory (--source / --answer take literal text; --source-file / --answer-file take paths): verbatimeter \ --source "We propose a new simple network architecture, the Transformer, based solely on attention mechanisms, dispensing with recurrence and convolutions entirely. Experiments on two machine translation tasks show these models to be superior in quality while being more parallelizable and requiring significantly less time to train." \ --answer "We propose a new simple network architecture, the Transformer, based solely on attention mechanisms, dispensing with recurrence and convolutions entirely" Every word is verbatim, so it reports matched=100% differing_tokens=0. Change a word in --answer — say solely to partly — and rerun: only that word turns up in the differing color. (PowerShell: use backtick line-continuation and the same quoting.) To try the quotation check instead, add --quotes and put a "…" span in the answer. Runnable samples live in examples/basics/. Usage The same check runs on three surfaces; pick by context. CLI verbatimeter --source-file source.txt --answer-file answer.txt verbatimeter --source "raw source text" --answer-file - < answer.txt verbatimeter --source-file source.txt --answer-file answer.txt --quotes verbatimeter --source-file source.txt --answer-file answer.txt --ngram 5 --source / --answer take literal text; --source-file / --answer-file take UTF-8 file paths, with - for stdin. Each pair is mutually exclusive, so interpretation never depends on what happens to exist in the working directory. Default scope is the whole text (green = verbatim, red = not in the source). --quotes restricts the check to quoted spans (the quotation-verification use) — straight "…", curly “…”, French guillemets « … » (inner padding spaces stripped), and low-9 „…“. Matching is contiguous by default: a word counts as verbatim only inside a run of at least --ngram consecutive words copied from the source. The default and minimum are 3 — shorter runs are coincidence-prone. A quotation shorter than --ngram words cannot contain such a run and therefore fails the gate; instruct your model to quote at least three consecutive words. --subsequence switches to order-only (LCS) matching, which measures verbatim paraphrasing. It deliberately has no run floor — single shared words in order are the signal — so --ngram is ignored in this mode. --quotes is a measurement like every other scope and exits 0. Add --fail to use it as a pipeline gate: the exit code becomes non-zero when any quotation contains differing tokens — or when no quotations are found at all (an answer that stops quoting must not pass a gate silently). --no-color for plain output; --palette picks the highlight colors (see Accessibility); --json emits machine-readable results. Library from verbatimeter import check, check_answer, render_result # check one text against a source (verbatim n-gram overlap): r = check(candidate_text, source_text, ngram=3) print(r.matched_ratio, r.longest_fragment, r.fragments) # or scope over an answer — the whole thing, or just its "…" quotations: result = check_answer(answer, source, scope="all") # or scope="quotes" print(render_result(result)) print(result.total_differing_tokens) check(...) returns a Result: Field Meaning words per-word verbatim flags — drives the highlighting fragments / longest_fragment the verbatim runs, and the longest run's word count matched_ratio fraction of the text's words matched in the source differing_tokens / total_tokens tokens that differ, against the text's size source_segment the smallest source window containing every matched word rouge_l ROUGE-L F1 between the text and source_segment — fidelity to the region it drew from Decorator from verbatimeter import verify @verify(source_arg="context", scope="quotes") def generate(prompt, context=None): return call_your_llm(prompt, context) generate("...", context=retrieved_passages) The wrapped function's return value is the answer. The source is resolved from a static source= and/or a runtime argument — the runtime value wins. Highlighting and stats print as a side effect (pass print_stats=False for a quiet mode), and the answer comes back as a str subclass with the full measurement attached as .result: existing string-handling code is unaffected, and the numbers are one attribute away. Omit scope="quotes" to check the whole answer. Streaming works automatically: if the decorated function returns an iterator of text chunks (yield delta from your provider's stream), the chunks pass through unchanged for your own UI while each word is printed in its final color as it arrives — green verbatim, red not — with the full CheckResult attached as .result once the stream completes. See examples/openai_rag_streaming_example.py. Integrating with a retrieval-augmented-generation agent? See docs/rag-agent-integration.md. Tokenizer The differing-token count uses tiktoken (encoding cl100k_base) by default. The vocabulary is bundled with the package (see THIRD_PARTY_NOTICES.md), so token counting works fully offline — the package never touches the network. To count with a different tokenizer — or avoid tiktoken entirely — pass a count_tokens callable (str -> int) to check, check_answer, or verify: check_answer(answer, source, count_tokens=lambda text: len(text.split())) When count_tokens is supplied, tiktoken is never imported. Accessibility The highlight colors are configurable on every surface — --palette on the CLI, and a palette= keyword on render_words, render_result, and verify (including streamed output): Preset Matched / differing For classic green / red the default colorblind blue / orange red–green color-vision deficiency neon bright green / magenta dark terminals and screen recordings mono bold / inverse video no color reliance at all Color is never load-bearing: the stats lines carry every number as plain text, and --json exposes the full result for machine consumption. Rendering honors the NO_COLOR convention, auto-disables color when output is not a terminal, and --no-color forces plain text. Enforcement Measure by default — enforce when asked. Every surface reports and exits 0 unless a verdict is requested; the exit code then becomes a branch point, and the consequence is yours to choose: # hard gate — a fabricated quotation blocks the pipeline verbatimeter --source-file ctx.txt --answer-file ans.txt --quotes --fail && publish # fallback — retry generation until the quotations check out until verbatimeter --source-file ctx.txt --answer-file ans.txt --quotes --fail; do regenerate_answer > ans.txt done # route — clean answers ship, dirty ones go to human review verbatimeter --source-file ctx.txt --answer-file ans.txt --quotes --fail || mv ans.txt review-queue/ The same verdict is available in Python without exit codes: answer = generate(question, context=ctx) if answer.result.total_differing_tokens > 0: answer = regenerate_with_warning(question, ctx) Because the check is deterministic, the gate never flakes: the same answer produces the same verdict every time, and when it fails, the highlighted words identify exactly which quotation broke and which words were fabricated. Performance verbatimeter is a word-level dynamic-programming alignment. Let S be the number of words in the source and C the number of words in the text being checked (the whole answer with scope="all", or the total quoted words with scope="quotes"). Step Time Memory Clean / tokenize O(S + C) O(S + C) Contiguous match (default) O(S · C) O(C) — two rolling DP rows Subsequence match (--subsequence) O(S · C) O(S · C) — full DP table ROUGE-L score O(S · C) O(C) — two rolling DP rows Token counting (tiktoken) O(C) — End-to-end time is O(S · C), dominated by the alignment. Contiguous keeps only the current and previous DP rows (O(C) memory) and runs a few times faster than subsequence, which materializes the whole S × C table. Measured with profiling/benchmark.py (random text, best of 5; absolute times are hardware-dependent):
isitsecure AI-powered security scanner for modern web apps. SAST + DAST + LLM code review in a single scan. Built for developers and vibe coders shipping web apps who need to know if their code is secure — without becoming security experts. Supports: TypeScript/JavaScript (Next.js, Express, tRPC), Python (Django, FastAPI, Flask), Java/Kotlin (Spring Boot) — and any HTTP API for DAST. Demo isitsecure scan --repo ./your-app — every scanner narrates as it runs, then you get a graded report (and a browseable HTML page) with the fixes. Contents Demo · What It Does Install · Quick Start · What It Costs Scan Modes · Scan Depth What It Scans — DAST · Special DAST · SAST · LLM · Cross-Referencing Language Support · Output Formats Auto-Fix · Security Badge How We Compare · What It Does NOT Cover Configuration — API Keys · OOB Callbacks · Authenticated Scanning CLI Reference · Web UI · MCP (AI coding tools) · Try It on the Test App Benchmarks · Privacy · Architecture Scanner Documentation · LSP Setup Contributing · License · Acknowledgements What It Does isitsecure runs 40 rule-based scanners by default — up to 44 with --depth deep — (plus optional AI code review) against your web app in a single command. It combines four approaches that commercial tools sell separately: SAST (Static Analysis) — scans your source code for vulnerabilities without running it DAST (Dynamic Analysis) — tests your live app by sending real HTTP requests LLM Code Review — uses AI to find business logic flaws that pattern matchers can't detect AI Fix Generation — generates code patches with unified diffs for every finding The unique parts: SAST findings automatically generate targeted DAST tests. Code shows no auth check → scanner sends an unauthenticated request and confirms it's exploitable. AI generates fixes, not just reports. --output fixes produces a Markdown fix plan you can paste into Cursor or Claude Code. Code → SAST → Findings → Guide DAST → Test → Cross-Reference → LLM Triage → Report → Fixes ↑ | └──────────────── LSP validates / suppresses false positives ───────────────────────────┘ Install Requirements: Python 3.11+ and git. (isitsecure isn't on PyPI — the isitsecure name there is an unrelated project, so don't pip install it.) Quick install (recommended) The installer verifies Python/git, then clones the repo, sets up an isolated environment, installs everything, and runs first-time setup: # macOS / Linux — download it, glance at it, run it curl -fsSLo install.sh https://raw.githubusercontent.com/jaurakunal/isitsecure/main/install.sh bash install.sh # Windows (PowerShell) irm https://raw.githubusercontent.com/jaurakunal/isitsecure/main/install.ps1 -OutFile install.ps1 ./install.ps1 If Python or git are missing, the installer tells you the exact command to install them for your OS and stops cleanly — it never leaves a half-finished state. Manual install Prefer to do it by hand: # 1. Clone the repo git clone https://github.com/jaurakunal/isitsecure.git cd isitsecure # 2. Install into a virtual environment (recommended) python3 -m venv .venv source .venv/bin/activate # Windows: .venv\Scripts\activate # 3. Install with all features (browser DAST, LLM review, OOB detection) pip install -e ".[all]" # 4. First-time setup — installs the Chromium browser, language servers, optionally saves an API key isitsecure setup pip install -e ".[all]" is the recommended install and enables every scanner. If you want a lighter footprint, the extras are opt-in: Install What works pip install -e . SAST / code-only scans only (--mode code-only) pip install -e ".[browser]" Adds DAST / live-URL scanning (requires isitsecure setup to install Chromium) pip install -e ".[llm]" Adds LLM code review, triage, and AI fixes (requires an API key) pip install -e ".[all]" Everything URL/DAST scanning needs the [browser] extra — without it, isitsecure scan <url> exits with a message telling you to install it. Quick Start # Scan a live URL (DAST only, no API key needed) isitsecure scan https://your-app.com --llm none # Scan source code (SAST only) isitsecure scan --repo https://github.com/you/your-app --mode code-only --llm none # Full scan (SAST + DAST + LLM review) isitsecure scan https://your-app.com --repo https://github.com/you/your-app --mode full # One command: scan + fix everything (the magic) isitsecure fix --repo ./your-app # Or dry-run first to preview fixes isitsecure fix --repo ./your-app --dry-run # Generate a security badge for your README isitsecure badge --repo ./your-app # Export for GitHub Code Scanning isitsecure scan --repo https://github.com/you/your-app --output sarif # Open the web UI (for non-CLI users) isitsecure launch What It Costs isitsecure is free and open source. The only cost is LLM API tokens for the AI-powered features: Scan Mode API Key Needed Estimated Cost URL-only (DAST without LLM) No $0 Code-only (SAST without LLM) No $0 Code-only + LLM review Yes ~$5–8 Full scan (SAST + DAST + LLM) Yes ~$10–15 Without an API key, you still get all rule-based scanners — 40 in the default quick depth (15 DAST + 8 special DAST + 17 SAST), or 44 with --depth deep (which adds 4 slower/aggressive DAST scanners). The LLM adds business logic review, semantic rule verification, and intelligent triage — things no pattern matcher can do. Supported LLM providers: Anthropic (Claude), Google (Gemini) Scan Modes Mode What It Does Requires url-only DAST scanners against a live URL Target URL code-only SAST scanners against source code GitHub repo URL authenticated DAST with login credentials (IDOR, cross-user BOLA, RLS, privilege escalation) URL + credentials (add a second account for cross-user tests) full Everything: SAST + DAST + authenticated + LLM review + cross-referencing URL + repo + credentials + API key auto (default) Detects mode from what you provide Whatever you give it Scan Depth Orthogonal to mode, --depth trades speed for coverage: Depth What runs When to use quick (default) Structural + config checks, error-based injection, and the snapshot-based scanners (headers, CORS, RLS, source-map, SRI, client-exposure, redirects…). Fast. Everyday scans — a solid first pass in a fraction of the time. deep Everything in quick plus the slow/aggressive probes: time-based (blind) SQL injection, active XSS, auth-bypass timing, rate-limit bursts, and password-reset flows. When you want the full arsenal and can wait. # Fast pass (default) isitsecure scan https://your-app.com --llm none # Full, aggressive DAST isitsecure scan https://your-app.com --depth deep --llm none The scan narrates each phase and every scanner as it runs (with elapsed time), so a longer deep scan shows continuous progress rather than appearing to hang. What It Scans DAST Scanners — Tests Your Live App 19 total — 15 run in the default quick depth; the 4 marked ◆ (slower/aggressive probes) are added by --depth deep.

AgentCloud AgentCloud is an open-source platform enabling companies to build and deploy private LLM chat apps (like ChatGPT), empowering teams to securely interact with their data. Explore our docs » Quickstart with AgentCloud · Run Locally · Tutorial - RAG Google Bigquery · Start Reading Blog Introduction Welcome to agentcloud. This project comprises three main components: Agent Backend: A Python application running crewai, communicating LLM messages through socket.io Webapp: A UI built using next.js, tailwind, and an express custom server. Vector Proxy: A Rust application which communicates with Qdrant vector Database Getting Started. To run this project locally, follow these steps: Clone the repository: git clone https://github.com/rnadigital/agentcloud.git Install Docker: Install Docker Start Services: For Mac & Linux: Run the following command: chmod +x install.sh && ./install.sh Follow the prompts or provide command-line arguments as needed. ~$ ./install.sh --help Usage: ./install.sh [options] Note: By default, vector-db-proxy `cargo build`'s without the `--release` flag, for faster builds during development. To change this, set RELEASE=true` in your env before running install i.e `RELEASE=true ./install.sh ...`. Options: -h, --help Display this help message. --kill-webapp-next Kill webapp after startup (for developers) --kill-vector-db-proxy Kill vector-db-proxy after startup (for developers) --kill-agent-backend Kill agent-backend after startup (for developers) --project-id ID (OPTIONAL) Specify a GCP project ID (for Secret Manager, GCS, etc) --service-account-json PATH (OPTIONAL) Specify the file path of your GCP service account json. --gcs-bucket-name NAME (OPTIONAL) Specify the GCS bucket name to use. --gcs-bucket-location LOCATION (OPTIONAL) Specify the GCS bucket location. For Windows: (Coming soon...) Tutorials How to Build a RAG Chatbot Using Agent Cloud and PostgreSQL How to Build a RAG Chatbot Using Agent Cloud and BigQuery How to Build a RAG Chatbot Using Agent Cloud and MongoDB How to Build a RAG Chatbot with Agent Cloud and Google Sheets Comparisons Agent Cloud vs CrewAI Agent Cloud VS OpenAI Agent Cloud vs Qdrant Agent Cloud VS Google Cloud Agents Documentation Documentation is available at Agent Cloud - Talk to Your Data Introduction Data sources RAG Examples Public Roadmap Check out our roadmap to stay updated on recently released features and learn about what's coming next.

MetaGPT: The Multi-Agent Framework [ En | 中 | Fr | 日 ] Assign different roles to GPTs to form a collaborative entity for complex tasks. News 🚀 Mar. 10, 2025: 🎉 mgx.dev is the #1 Product of the Week on @ProductHunt! 🏆 🚀 Mar. 4, 2025: 🎉 mgx.dev is the #1 Product of the Day on @ProductHunt! 🏆 🚀 Feb. 19, 2025: Today we are officially launching our natural language programming product: MGX (MetaGPT X) - the world's first AI agent development team. More details on Twitter. 🚀 Feb. 17, 2025: We introduced two papers: SPO and AOT, check the code! 🚀 Jan. 22, 2025: Our paper AFlow: Automating Agentic Workflow Generation accepted for oral presentation (top 1.8%) at ICLR 2025, ranking #2 in the LLM-based Agent category. 👉👉 Earlier news Software Company as Multi-Agent System MetaGPT takes a one line requirement as input and outputs user stories / competitive analysis / requirements / data structures / APIs / documents, etc. Internally, MetaGPT includes product managers / architects / project managers / engineers. It provides the entire process of a software company along with carefully orchestrated SOPs. Code = SOP(Team) is the core philosophy. We materialize SOP and apply it to teams composed of LLMs. Software Company Multi-Agent Schematic (Gradually Implementing) Get Started Installation Ensure that Python 3.9 or later, but less than 3.12, is installed on your system. You can check this by using: python --version. You can use conda like this: conda create -n metagpt python=3.9 && conda activate metagpt pip install --upgrade metagpt # or `pip install --upgrade git+https://github.com/geekan/MetaGPT.git` # or `git clone https://github.com/geekan/MetaGPT && cd MetaGPT && pip install --upgrade -e .` Install node and pnpm before actual use. For detailed installation guidance, please refer to cli_install or docker_install Configuration You can init the config of MetaGPT by running the following command, or manually create ~/.metagpt/config2.yaml file: # Check https://docs.deepwisdom.ai/main/en/guide/get_started/configuration.html for more details metagpt --init-config # it will create ~/.metagpt/config2.yaml, just modify it to your needs You can configure ~/.metagpt/config2.yaml according to the example and doc: llm: api_type: "openai" # or azure / ollama / groq etc. Check LLMType for more options model: "gpt-4-turbo" # or gpt-3.5-turbo base_url: "https://api.openai.com/v1" # or forward url / other llm url api_key: "YOUR_API_KEY" Usage After installation, you can use MetaGPT at CLI metagpt "Create a 2048 game" # this will create a repo in ./workspace or use it as library from metagpt.software_company import generate_repo from metagpt.utils.project_repo import ProjectRepo repo: ProjectRepo = generate_repo("Create a 2048 game") # or ProjectRepo("<path>") print(repo) # it will print the repo structure with files You can also use Data Interpreter to write code: import asyncio from metagpt.roles.di.data_interpreter import DataInterpreter async def main(): di = DataInterpreter() await di.run("Run data analysis on sklearn Iris dataset, include a plot") asyncio.run(main()) # or await main() in a jupyter notebook setting QuickStart & Demo Video Try it on MetaGPT Huggingface Space Matthew Berman: How To Install MetaGPT - Build A Startup With One Prompt!! Official Demo Video metagpt_video_wall_2025.mp4 Tutorial 🗒 Online Document 💻 Usage 🔎 What can MetaGPT do? 🛠 How to build your own agents? MetaGPT Usage & Development Guide | Agent 101 MetaGPT Usage & Development Guide | MultiAgent 101 🧑💻 Contribution Develop Roadmap 🔖 Use Cases Data Interpreter Debate Researcher Receipt Assistant ❓ FAQs Support Discord Join US 📢 Join Our Discord Channel! Looking forward to seeing you there! 🎉

Record every LLM call, tool invocation, and error your agent makes. Replay it step-by-step like a video. Fork from any point, change the input, and watch the whole agent re-execute down a new path. Share any run as an interactive, public link. Python · TypeScript · How It Works · Docs Python pip install retrace-sdk import retrace retrace.configure(api_key="rt_...") @retrace.record(name="research-agent", resumable=True) def run_agent(prompt: str): plan = call_planner(prompt) # captured automatically results = call_tools(plan) # captured automatically return summarize(results) # captured automatically run_agent("What changed in vector databases this year?") See python/README.md for the full reference. TypeScript npm install retrace-sdk import { configure, trace } from "retrace-sdk"; configure({ apiKey: "rt_..." }); const runAgent = trace(async (prompt: string) => { const plan = await callPlanner(prompt); // captured automatically const results = await callTools(plan); // captured automatically return summarize(results); // captured automatically }, { name: "research-agent", resumable: true }); await runAgent("What changed in vector databases this year?"); See typescript/README.md for the full reference. How It Works The SDK is a thin capture layer. It wraps your function, auto-instruments provider calls (OpenAI, Anthropic, Gemini), and streams spans to Retrace over a resilient transport — never blocking or crashing your agent. flowchart LR subgraph yourproc["Your process"] fn["@record / trace()"] --> cap["auto-captured spans<br/>(LLM · tool · error)"] cap --> buf["offline buffer<br/>(bounded, flush on reconnect)"] end buf == "WebSocket (primary)" ==> api["Retrace"] buf -. "HTTP fallback" .-> api api == "resume: re-execute from fork point" ==> fn classDef p fill:#0f3d2e,stroke:#10b981,color:#d1fae5; class api p; Loading Capture — provider calls are intercepted automatically; you can also emit manual spans. Transport — spans stream over a WebSocket; if it drops, the SDK falls back to HTTP and replays a bounded offline buffer on reconnect, so nothing is lost. Resumable — mark a function resumable and a dashboard fork re-executes it from any step with modified input (cascade replay). Safe by default — failures in the SDK never surface into your agent; typed errors expose real problems explicitly. Documentation Full documentation at docs.retraceai.tech.

Our AI finds products from public sources, then rotates exposure so useful newcomers have a fair chance to be seen.
Learn how discovery works